
Website chat
You add one line to your website, a chat bubble appears for visitors, and everyone who writes in it becomes a conversation in your inbox — right next to WhatsApp and Messenger.
Setup
- Integrations → the Web chat card → Set up connection.
- Website domain — as https://company.com. This field is not cosmetic: the widget works on that domain only, which is what stops anyone else from installing your chat on their site.
- Greeting — the first thing a visitor reads. Write a question, not a hello; questions get answered.
- Widget colour — make it your site's colour.
- Press Test connection and save.
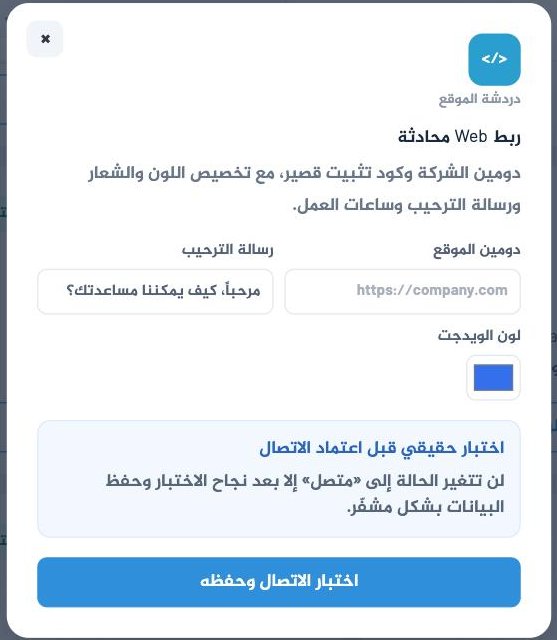
That is deliberate. A card claiming "connected" without a real test is worse than one that says "ready to connect".
Install code
After a successful test a line like this appears. Paste it into your site just before the closing </body> tag:
<script src="https://crm.itc-s.com/webchat/<your-id>.js"
data-itc-chat="<your-key>" async></script>Do not post it in a forum or send it in a screenshot. Whoever holds it can impersonate your site's chat. If it leaks, open the dialog and press Test connection and save to issue a new key.
AI on your website
Website chat is the best channel for the AI auto-reply: no 24-hour window, no templates, no ban risk. Turn it on from AI auto-reply, and read the rule there about notes describing a complete path — it is the source of most complaints.
If it does not work
The bubble does not appear on the site
Three causes in order: the domain saved in the platform differs from the real one (www counts as a difference), the line was pasted outside <body>, or your site's cache has not refreshed.
The visitor types and nothing arrives
Open your site, press F12 → Console, and send us whatever is red. It saves an hour of guessing.