
Connecting Facebook Messenger
Once connected, messages to your Facebook Page arrive in the unified inbox, and your staff answer them in the same place they answer WhatsApp.
What you need first
- To be an admin of the Page — not an editor, not an advertiser.
- A verified Meta Business account.
- Meta's approval for pages_messaging — that one is ours, already granted for the whole platform.
Steps
- Sidebar: Integrations → the Facebook Messenger card → Manage connection.
- Press Continue with Facebook. A Facebook sign-in window opens — theirs, not ours.
- Approve the permissions, then select the Pages you want. Do not untick a Page whose messages you want.
- You return to the platform and your Pages appear as buttons. Press Connect "Page name".
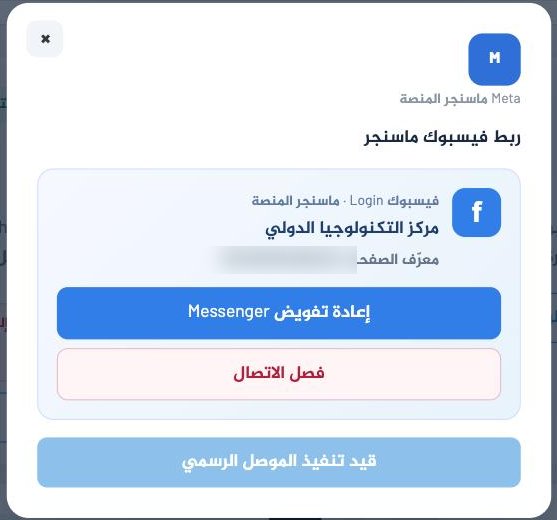
Authorisation expires — and that is normal
Facebook tokens have a limited life. When one expires, messages stop arriving with no error on the customer's phone — they simply think you ignored them. The fix is Re-authorise Messenger in the same dialog, and it takes thirty seconds.
Make it a habit: open Integrations once a week and confirm the status reads "connected".
If it does not work
No Page appears after signing in
Two causes: you are not an admin of the Page, or you unticked the Pages in the Facebook window. Run Continue with Facebook again and make sure the Page is ticked.
The button is disabled: "waiting for the central Meta app"
A missing setting on our side, not yours. Write to us.
It says connected but nothing arrives
Try from a different Facebook account — a message you send to your own Page from the account that manages it may not be treated as a customer message. If it arrives from the other account, the connection is fine.
Meta allows free replies within 24 hours of the customer's last message. Outside it, a message may be rejected or need a special tag. Keep replies inside the window whenever you can.